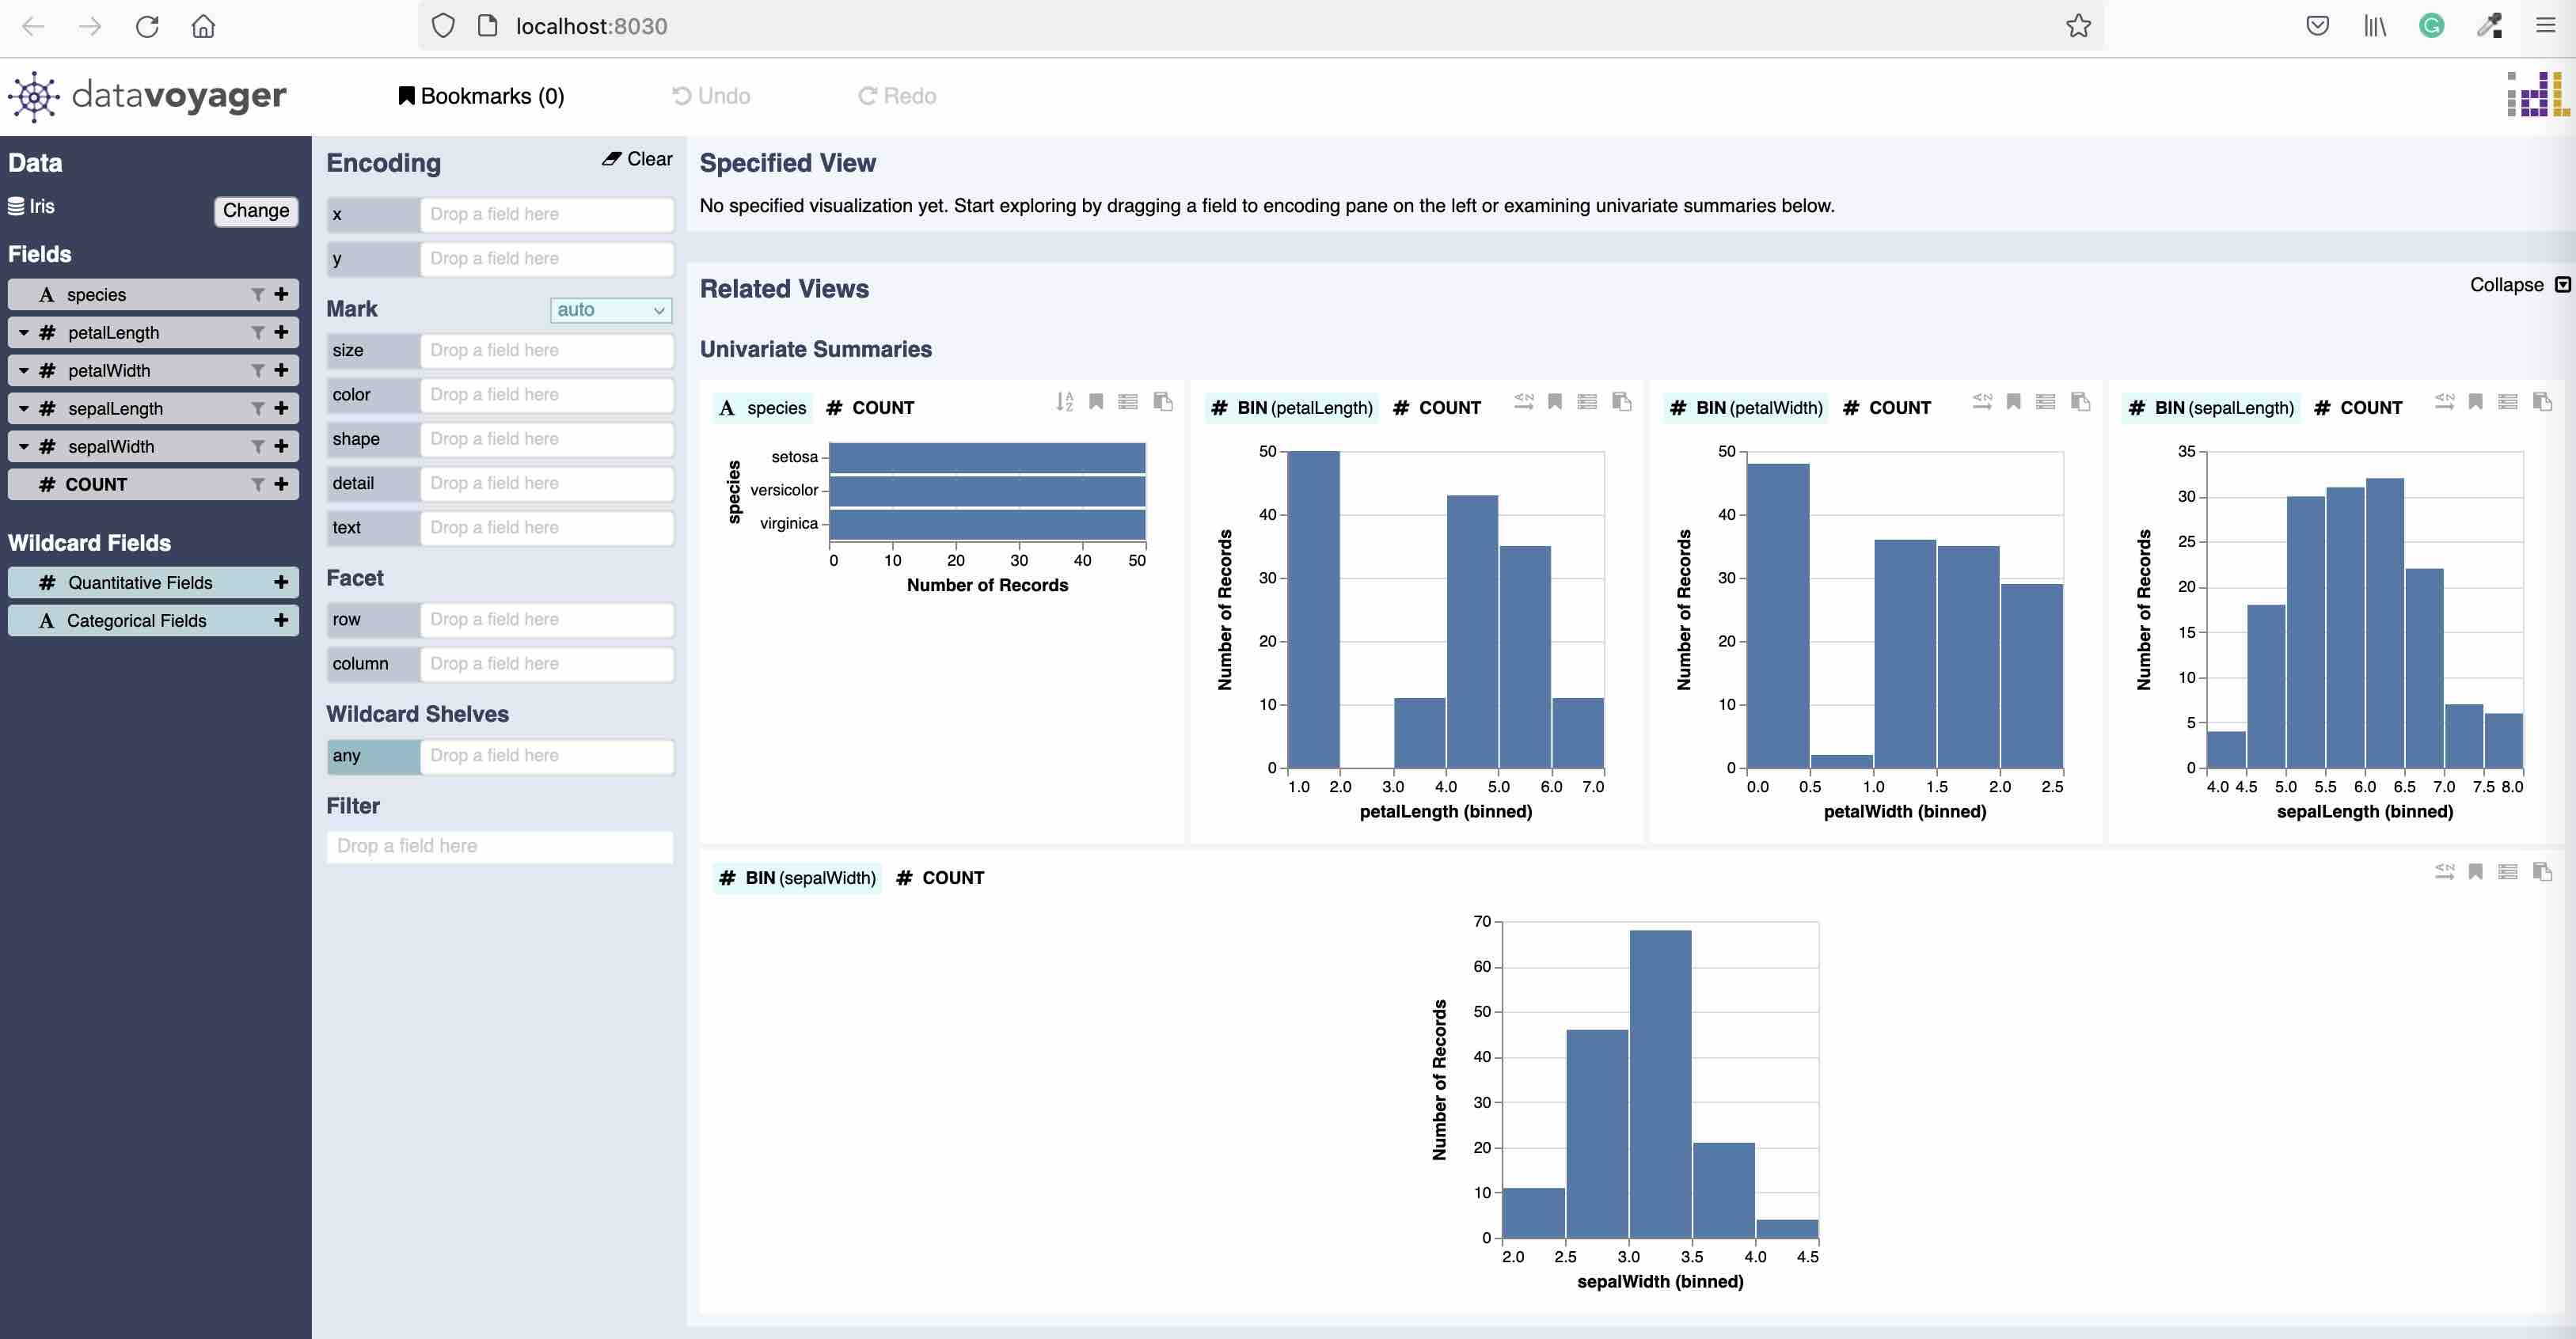
Voyager
In this example we are going to add Voyager - a data exploration tool with a browser-based user interface that blends manual and automated chart specification.
Voyager is a Javascript application. We will clone code repository, install dependencies and build Voyager.
Requirements
First thing is to install python2. Voyager has rather outdated dependencies. Luckily workspace is completely isolated, and this won't affect you main environment.
Open workspace terminal and execute the next commands:
$ sudo apt-get update
$ sudo apt-get install -y python2

Preparing to unpack .../python2_2.7.17-2ubuntu4_amd64.deb ...
Unpacking python2 (2.7.17-2ubuntu4) ...
Setting up libpython2.7-stdlib:amd64 (2.7.18-1~20.04.3) ...
Setting up python2.7 (2.7.18-1~20.04.3) ...
Setting up libpython2-stdlib:amd64 (2.7.17-2ubuntu4) ...
Setting up python2 (2.7.17-2ubuntu4) ...
Processing triggers for mime-support (3.64ubuntu1) ...
Build
Now, clone Voyager GitHub repository, and go into it:
$ git clone https://github.com/vega/voyager.git ~/apps/voyager

Cloning into '/home/abc/apps/voyager'...
remote: Enumerating objects: 21671, done.
remote: Counting objects: 100% (185/185), done.
remote: Compressing objects: 100% (163/163), done.
remote: Total 21671 (delta 64), reused 103 (delta 20), pack-reused 21486
Receiving objects: 100% (21671/21671), 77.35 MiB | 2.90 MiB/s, done.
Resolving deltas: 100% (14910/14910), done.

$ cd ~/apps/voyager

with <font color="#FDEB61">abc</font> in <font color="#37E6E8">~/apps/voyager</font> on <font color="#BC94B7">⇡master</font> <font color="#98E242">➜</font>
Create an isolate node environment:
$ nodeenv --node=12.18.3 env

with <font color="#FDEB61">abc</font> in <font color="#37E6E8">~/apps/voyager</font> on <font color="#BC94B7">⇡master</font> <font color="#98E242">➜</font> <font color="#5EA702">nodeenv</font> --node=12.18.3 env
 * Install prebuilt node (12.18.3) ..... done.
Activate this environment
$ . env/bin/activate

(env) 18:11:21 with <font color="#FDEB61">abc</font> in <font color="#37E6E8">~/apps/voyager</font> on <font color="#BC94B7">⇡master</font> 📦 <font color="#F54235">v2.0.0-alpha.24</font> via <font color="#99E343">⬢ v12.18.3</font> <font color="#98E242">➜</font>
Install yarn
$ npm install -g yarn

+ yarn@1.22.19
added 1 package in 1.697s
Install required packages
$ yarn

Binary found at /home/abc/apps/voyager/node_modules/node-sass/vendor/linux-x64-72/binding.node
Testing binary
Binary is fine
node-sass@4.14.1 /home/abc/apps/voyager/node_modules/node-sass
Done in 91.65s.
Build Voyager
$ yarn build

Done in 144.69s.
Run
We have built voyager, now we can start it
$ yarn start

<font color="#3C6894">ℹ</font> <font color="#646562">「wdm」</font>: Compiled successfully.
Voyager operates on port 9000. To verify if it's active, you can open another terminal and run curl localhost:9000.
However, at this point, Voyager is only accessible from the terminal. The workspace exposes the port range of 8020-8040. So, we'll set up port forwarding from port 9000 to 8026, allowing us to open Voyager in the browser like any other application.
To do this, open a new terminal window and execute the following command:
$ socat tcp-listen:8026,reuseaddr,fork tcp:localhost:9000

<font color="#646562">_</font>
Now we can open Voyager from the "My-apps" tab on the workspace UI.
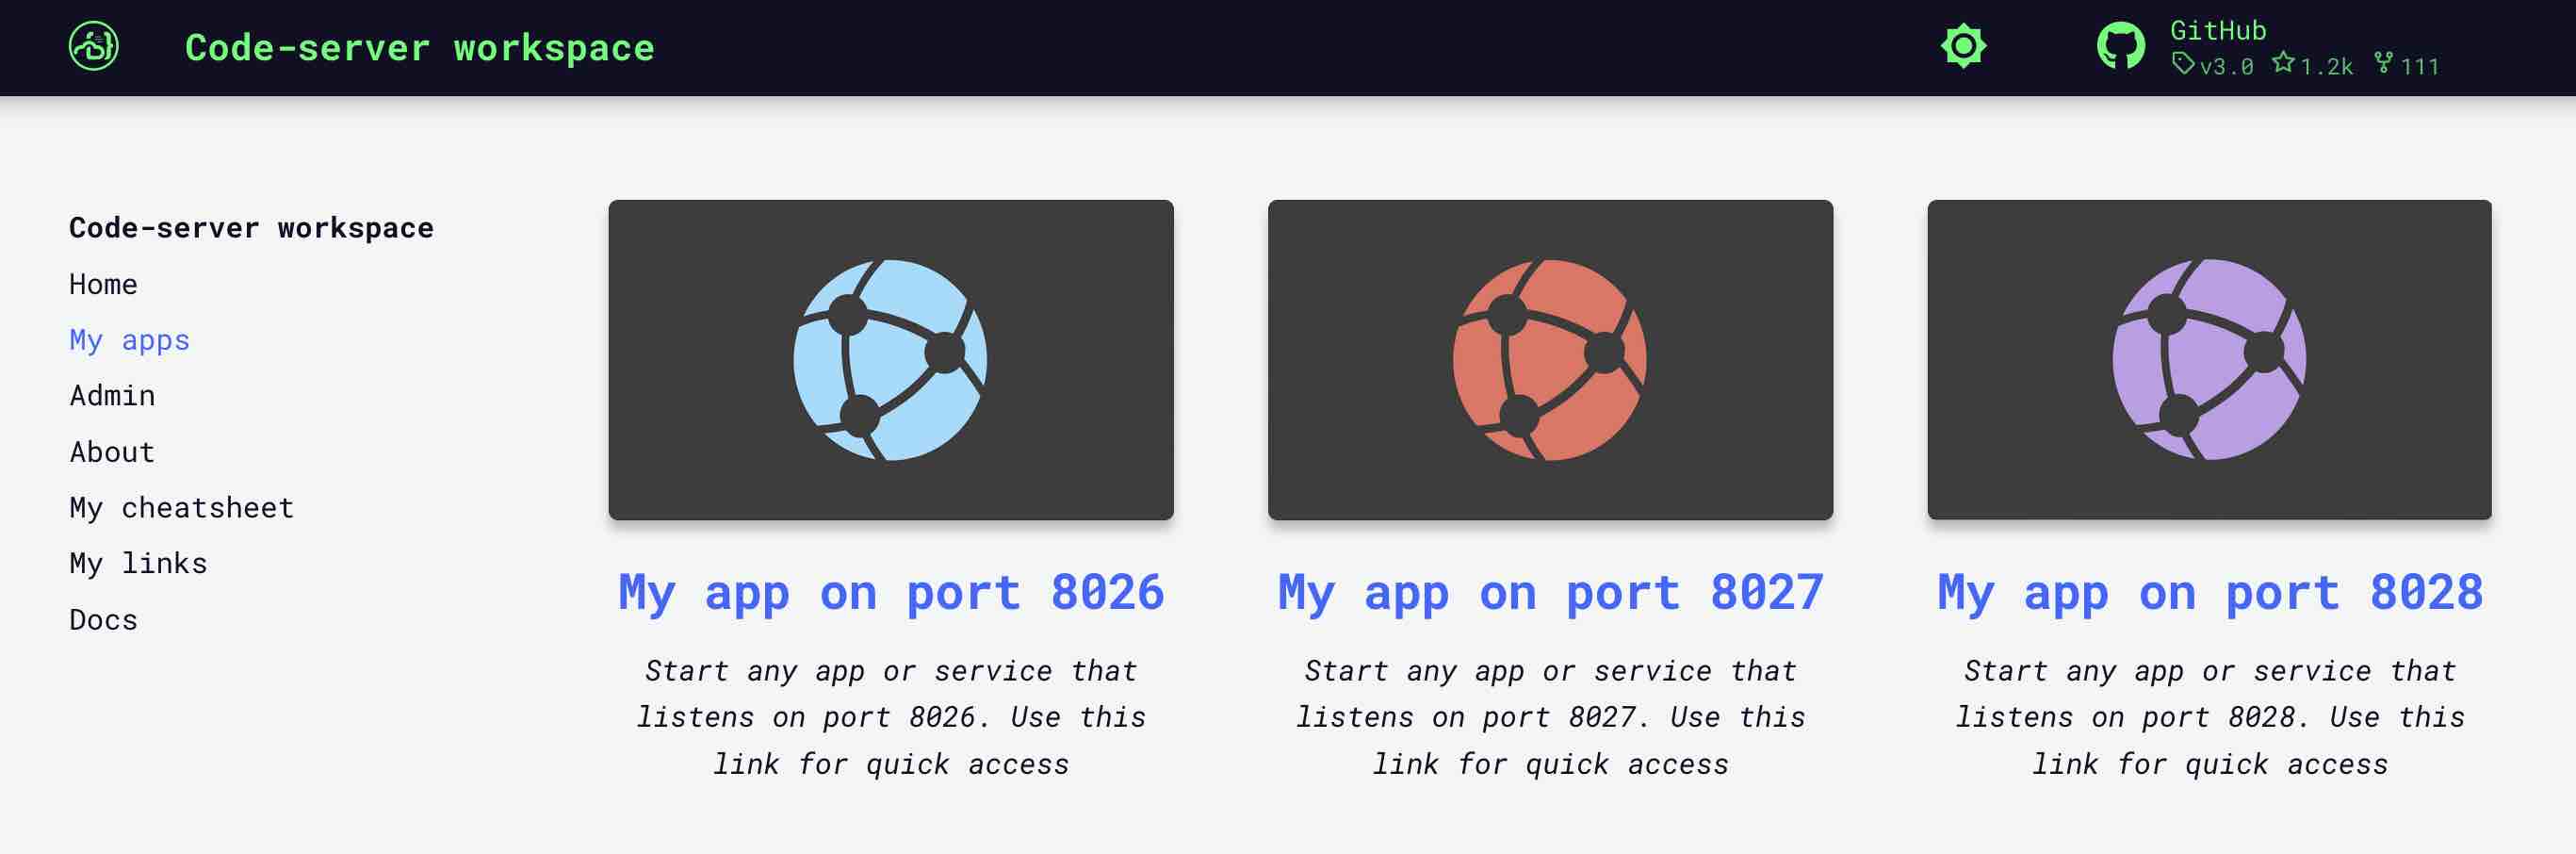
As soon as we close terminal Voyager will terminale. To keep Voyager running continuously, even after closing the terminal or restarting the workspace, add it as a permanent application via the workspace admin page.
Permanent service
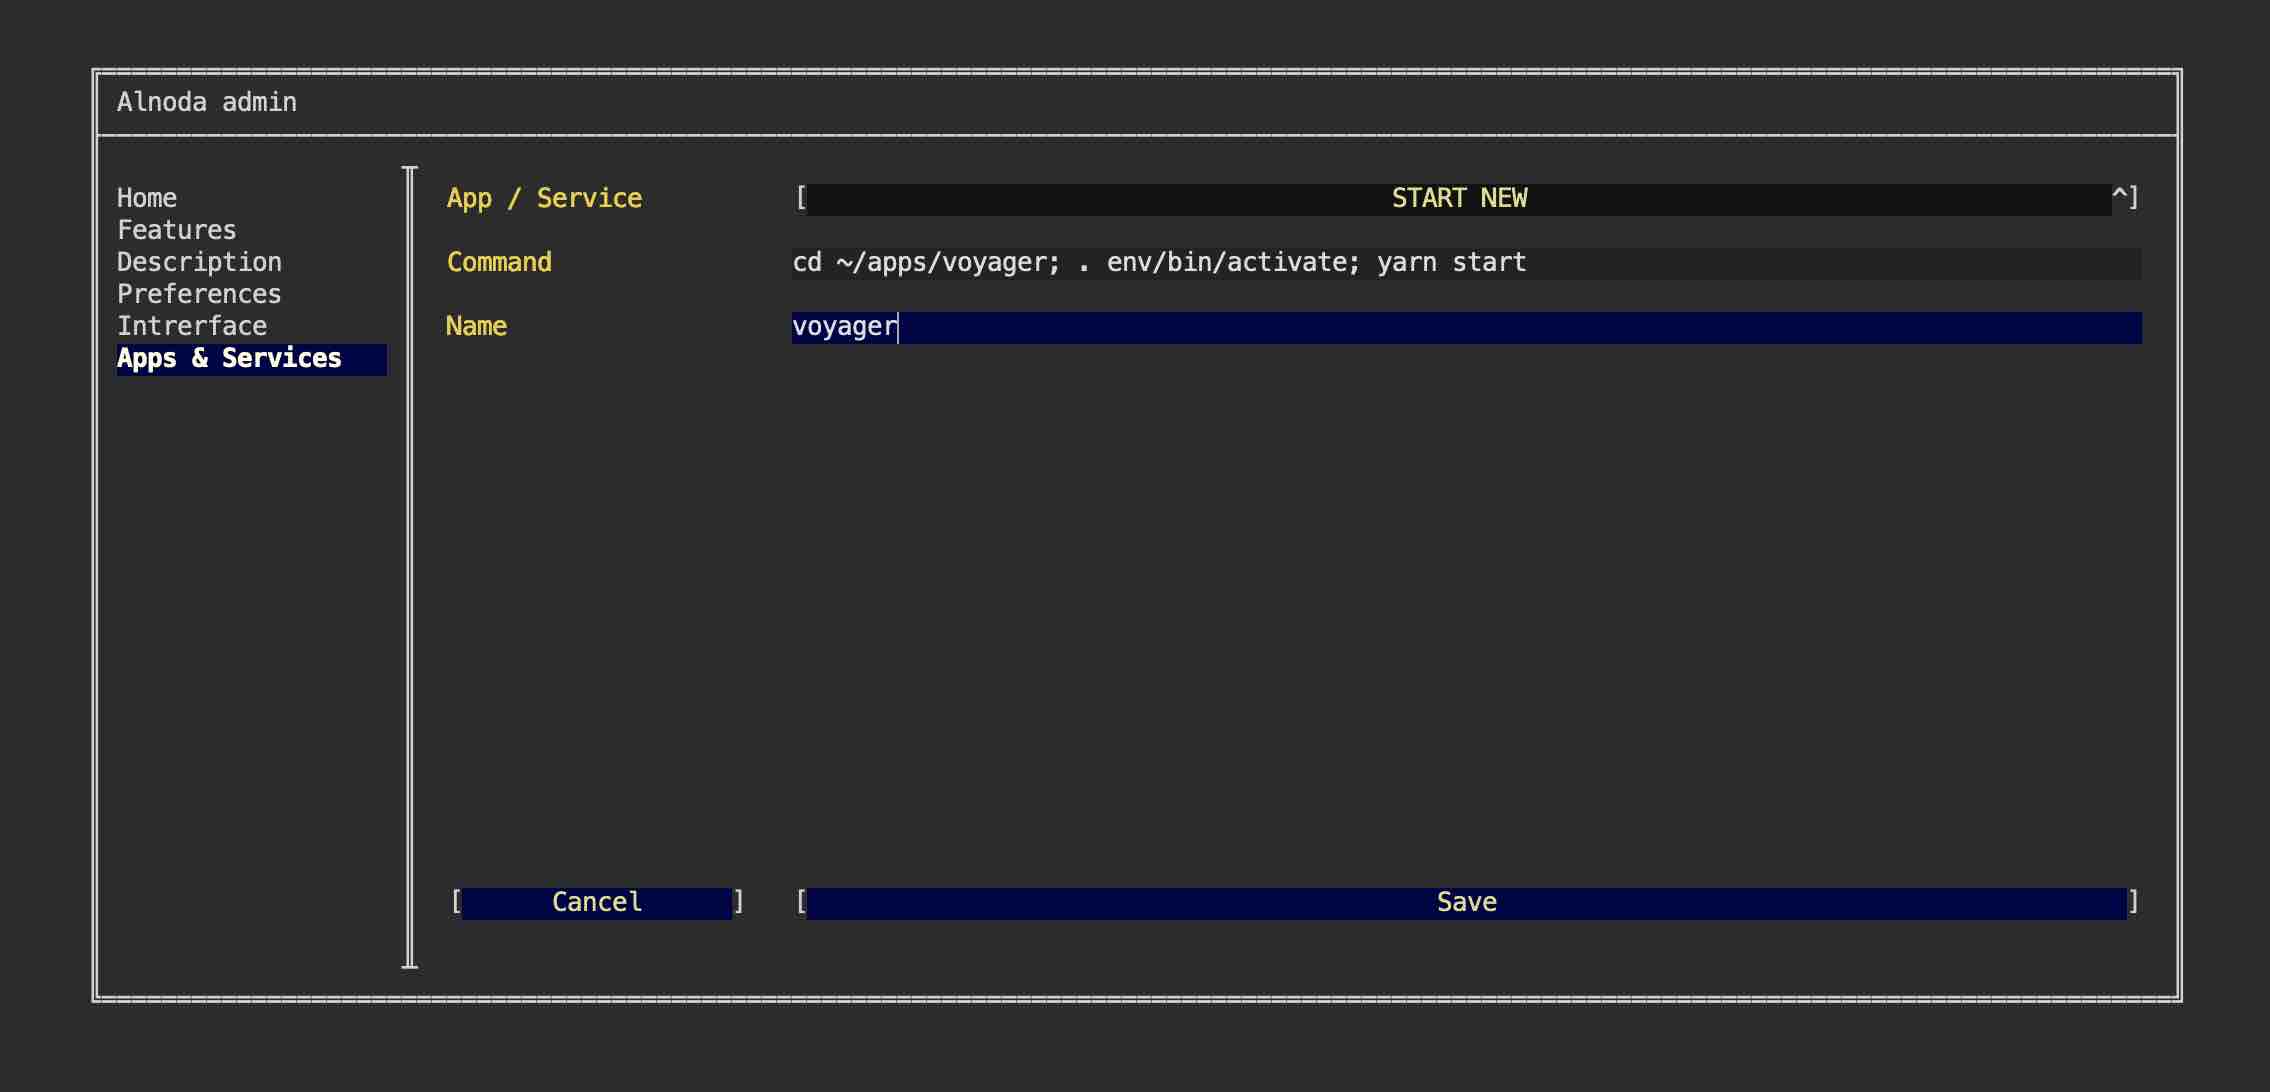
Let's add Voyager as a permanent workspace application. Go to the "Admin" tab, open "Workspace Settings" and go to "Apps & Services".
Here we can add new applications to the workspace. To do this we need to provide the command that sarts an application or service, and give this service a name.
Let's first create an entry for Voyager. Select "START NEW" from the picklist, enter any name and paste this command
cd ~/apps/voyager; . env/bin/activate; yarn start
This commad will start Voyager. It consist of 3 sub-commands, separated by semicolon: go to voyager folder, activate environment and start application.
Let's also start the port tunneling, which will map voyager's port 9000 to the port 8032. The latter is in the exposed range, hence it can be accessed.
Warning
This example relies on port 8032 being available within your workspace. To verify the availability of this port, please consult the 'About' tab within your workspace's UI.
Select "START NEW" from the picklist, enter any name and paste this command
socat tcp-listen:8032,reuseaddr,fork tcp:localhost:9000
Please restart the workspace for new applications to start.
Update UI
Finally, let's add Voyager shortcut to the workspace UI. This will allow us to open Voyager directly from the worspace UI page.
Shortcut has title, description and image. Use filebrowser or IDE to upload any image into the workspace. You can choose whatever you like, one option - is to create a printscreen of the Voyager app itself.
After you upload the image to the workspace, go to the "Interface" tab of the workspace settings and select "CREATE NEW" from the picklist.
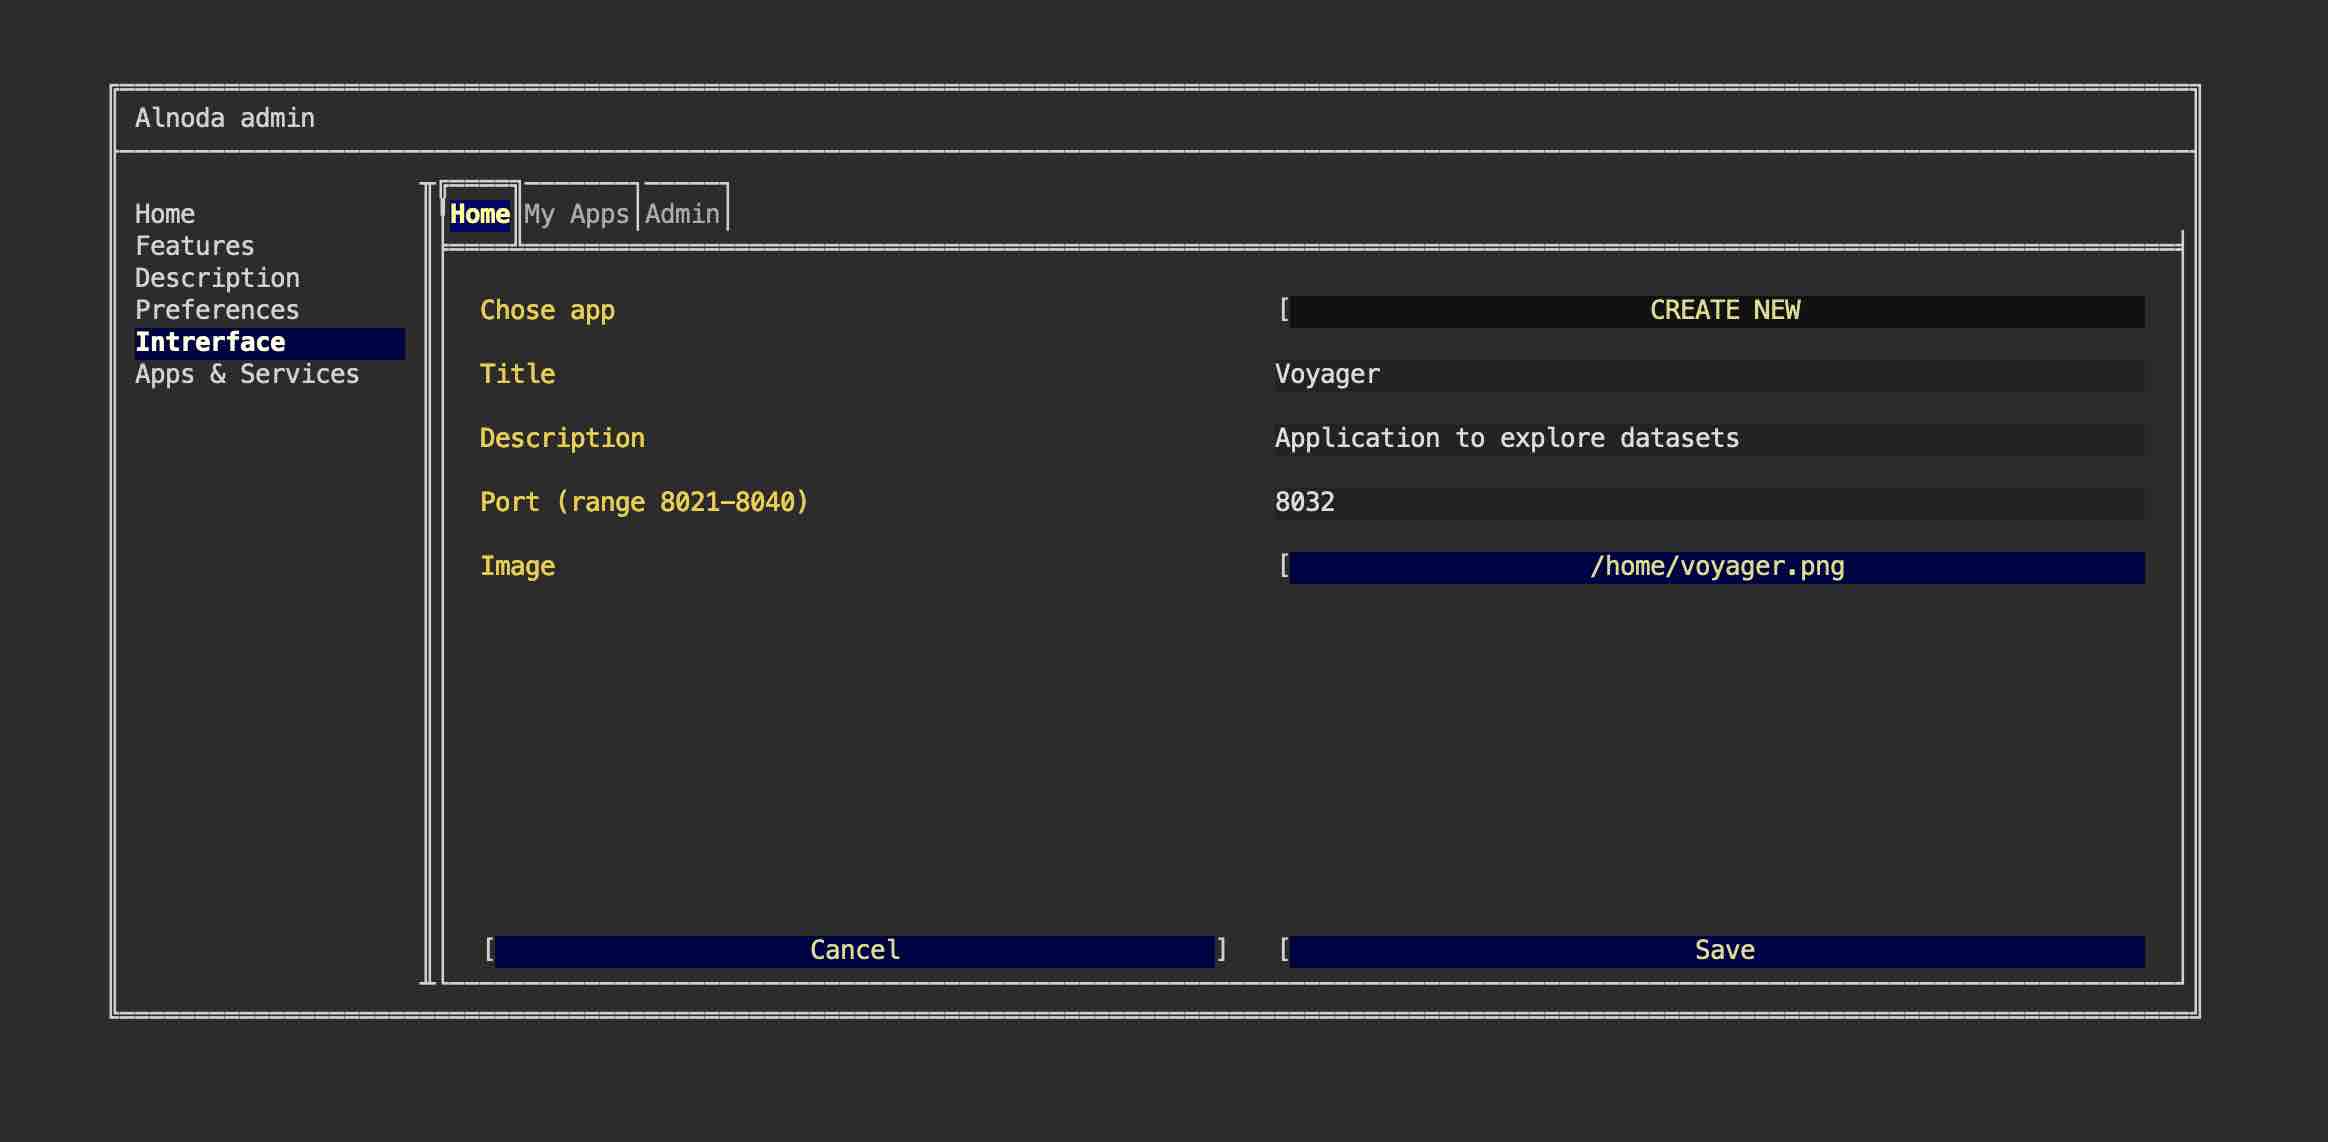
Give it any title and description. In the field "Port" enter port 8032. Leave field "path" blank. Then select your image.
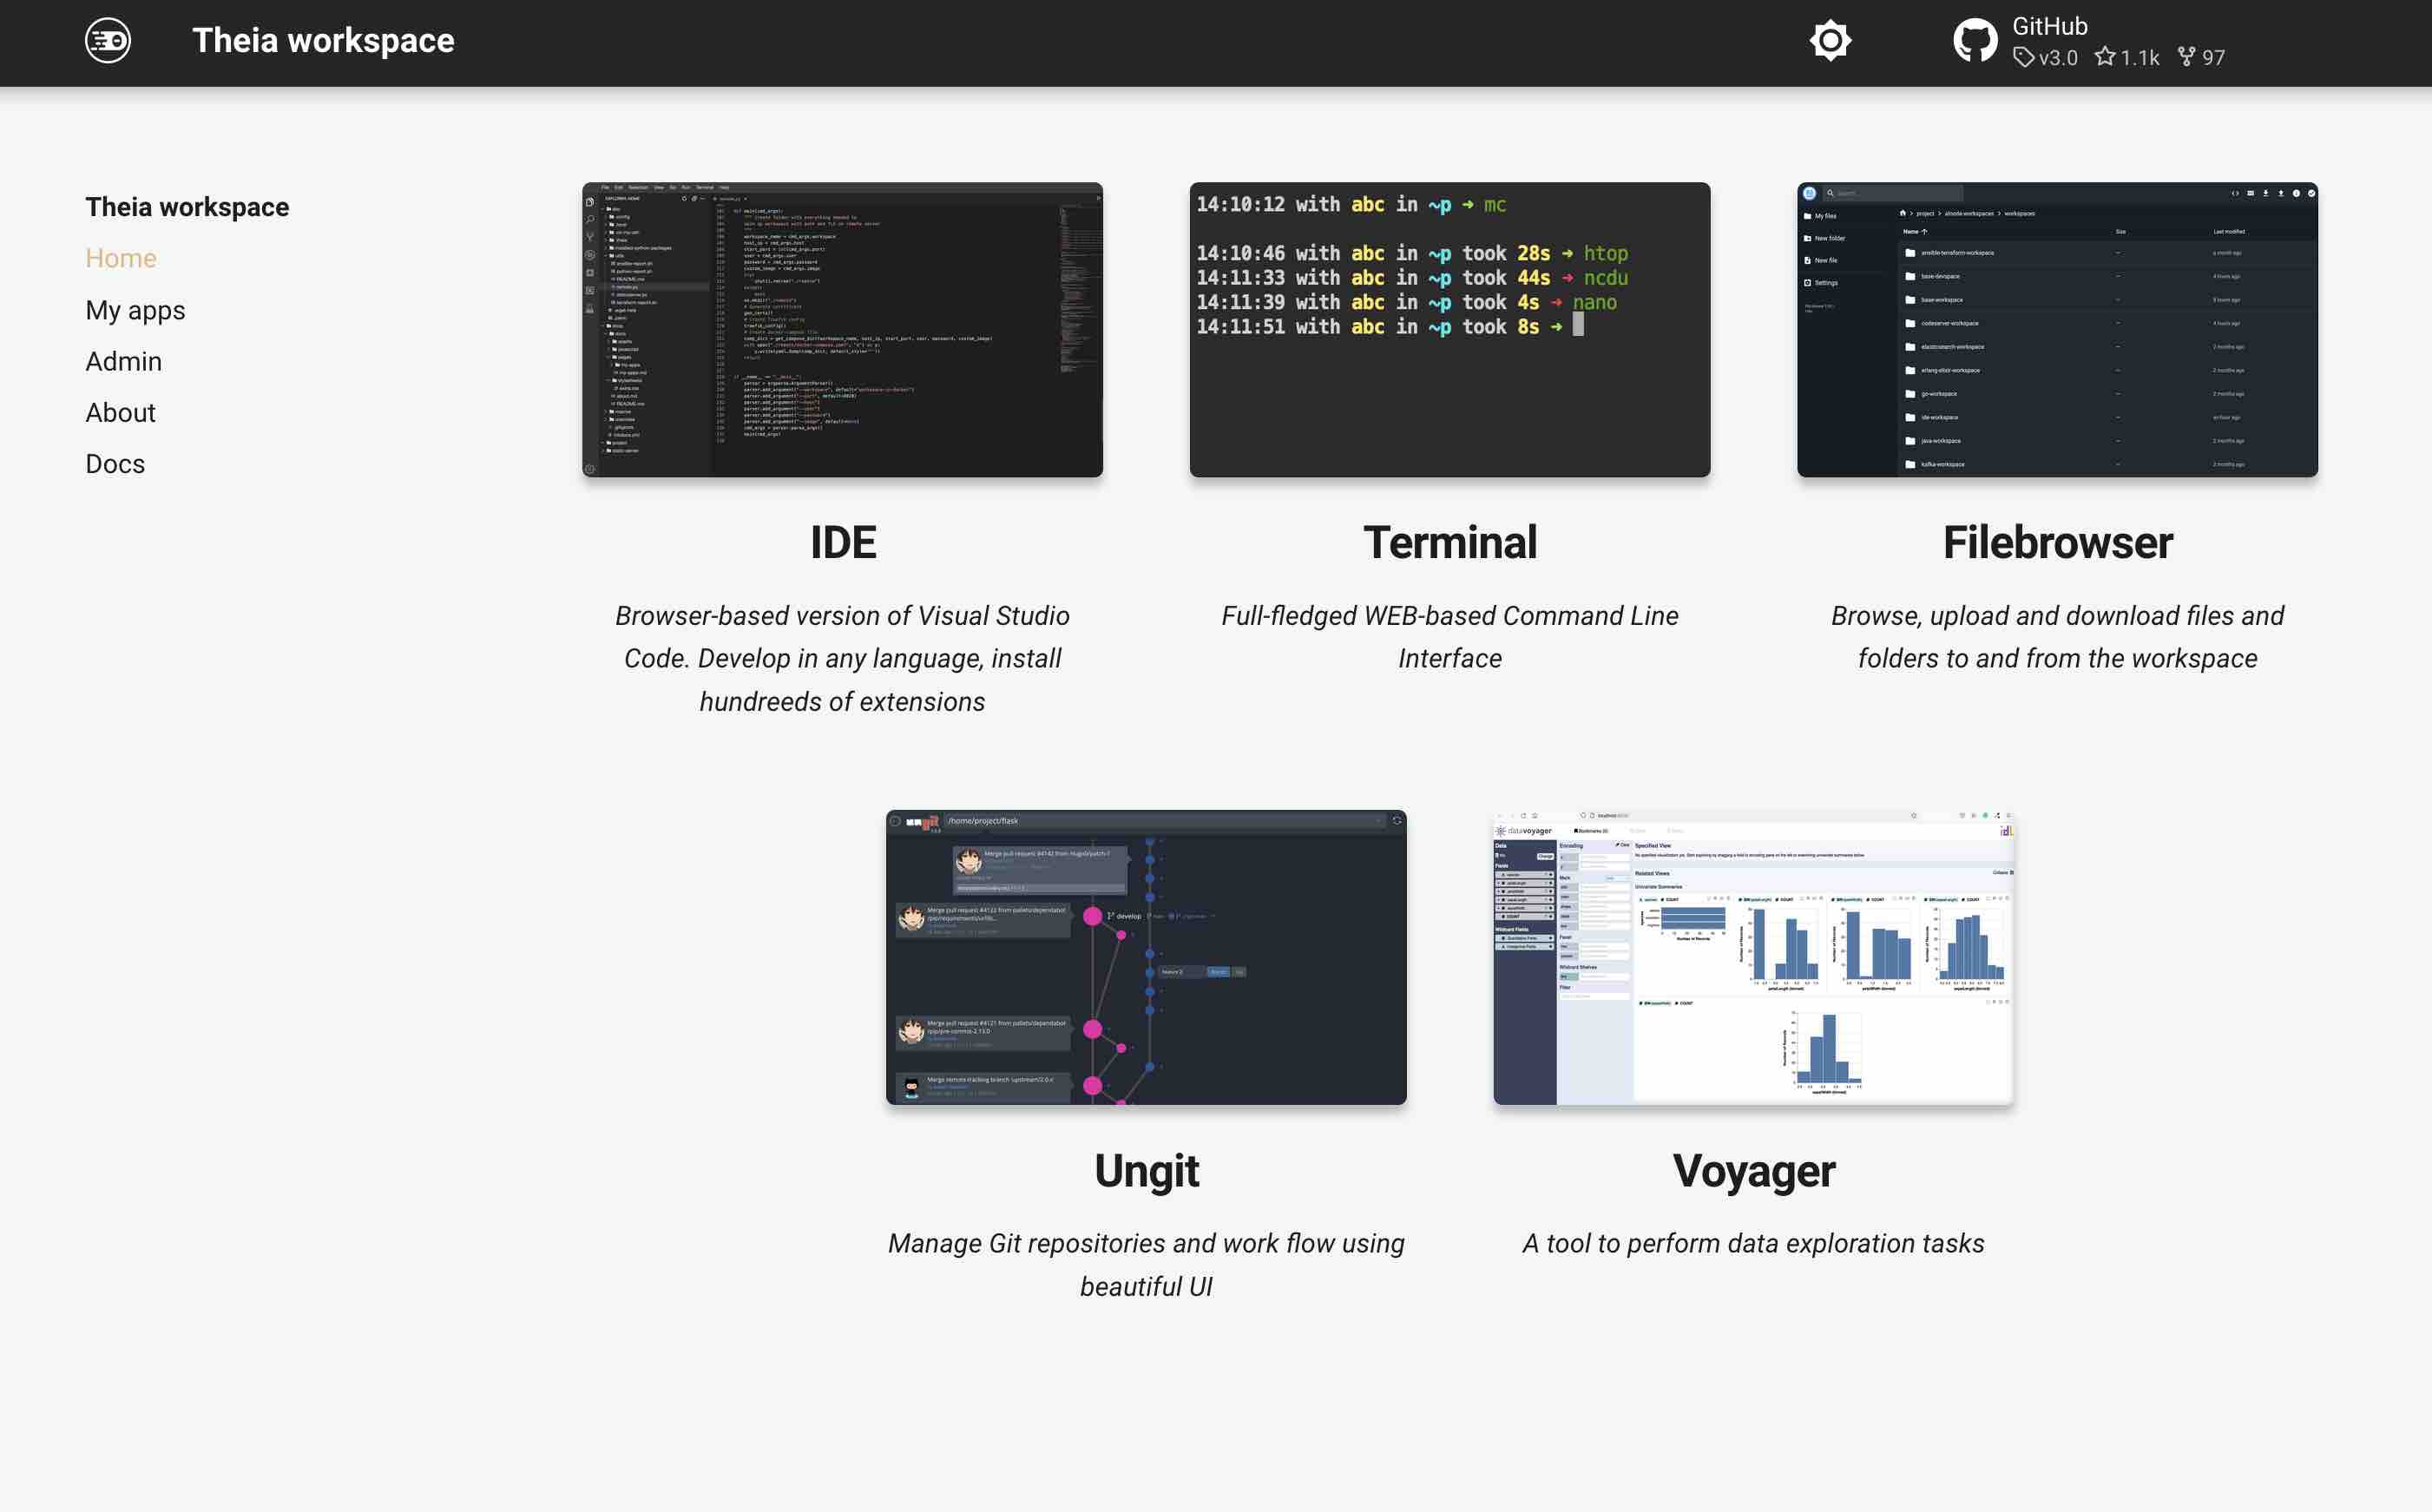
Now we have Voyager tab on the Home page of the workspace.
Tip
Use the Alnoda Hub for application installation - it greatly simplifies the process!