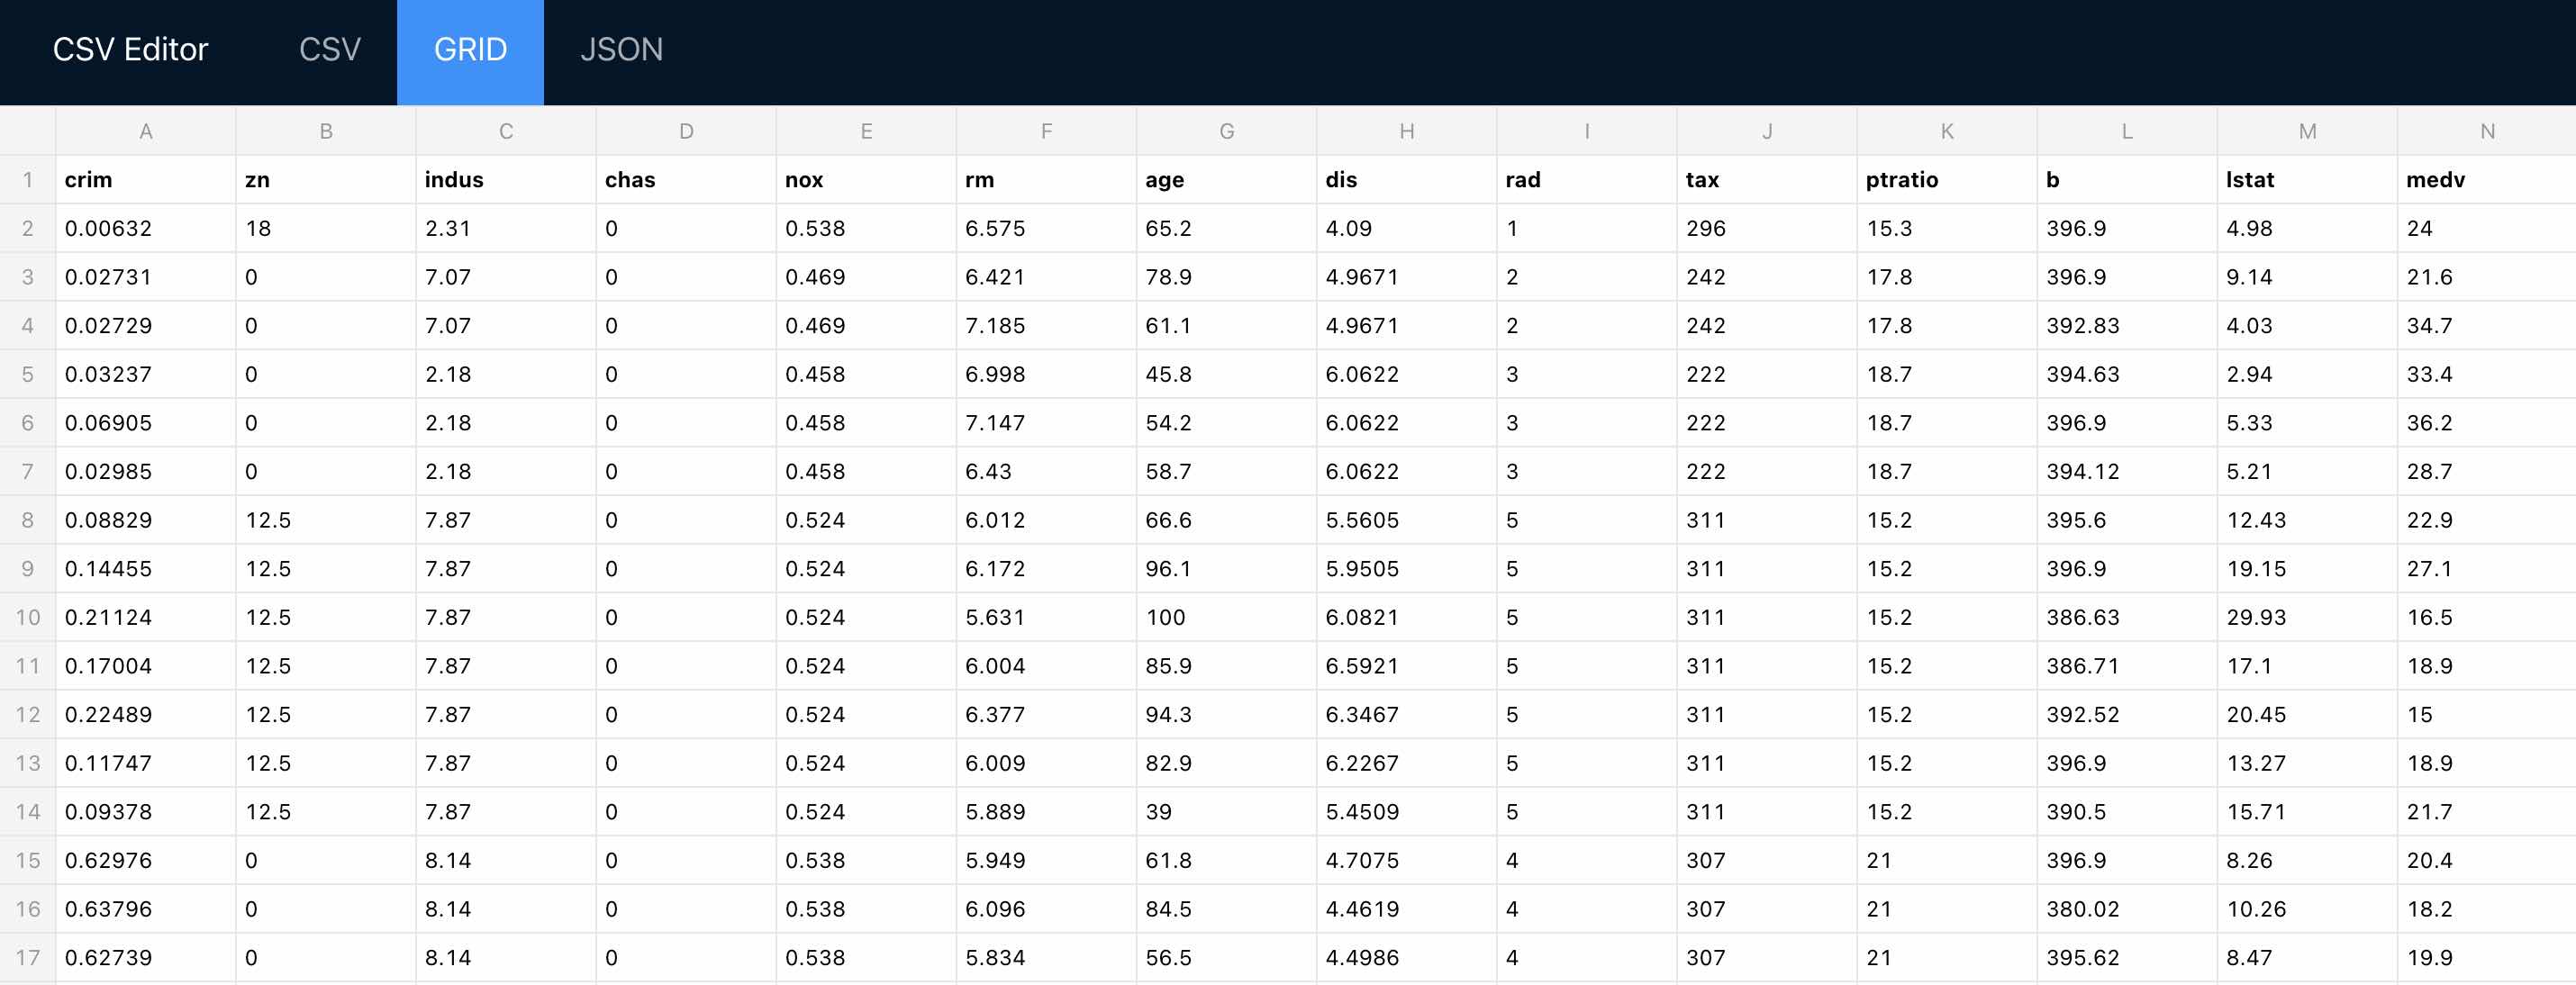
CSV Editor
In this example we will set up csv-editor which allows to change CSV in spreadsheet view in simple way.
Install
Open workspace terminal, clone Csv-editor git repository version 0.3.0:
$ git clone https://github.com/LemonUnit/csv-editor-online.git /home/abc/apps/csv-editor

Cloning into '/home/abc/apps/csv-editor'...
remote: Enumerating objects: 282, done.
remote: Counting objects: 100% (20/20), done.
remote: Compressing objects: 100% (14/14), done.
remote: Total 282 (delta 6), reused 20 (delta 6), pack-reused 262
Receiving objects: 100% (282/282), 3.05 MiB | 11.72 MiB/s, done.
Resolving deltas: 100% (145/145), done.
Go to the repo we have just cloned:
$ cd /home/abc/apps/csv-editor

with <font color="#FDEB61">abc</font> in <font color="#37E6E8">/home/abc/apps/csv-editor</font> on <font color="#BC94B7">⇡master</font> <font color="#98E242">➜</font>
Create node enviroment and activate it:
$ nodeenv --node=12.7.0 env && . env/bin/activate

 * Install prebuilt node (12.7.0) ..... done.
(env) 19:58:14 with <font color="#FDEB61">abc</font> in <font color="#37E6E8">/home/abc/apps/csv-editor</font> on <font color="#BC94B7">⇡master</font> is 📦  <font color="#5EA702">via ⬢ v12.7.0</font>  <font color="#98E242">➜</font>
Install yarn:
$ npm install -g yarn

+ yarn@1.22.19
added 1 package in 1.537s
Install dependencies:
$ yarn install

[4/4] Building fresh packages...
Done in 71.73s.
Build the app:
$ yarn run build

The project was built assuming it is hosted at <font color="#5EA702">/csv-editor-online/</font>.
You can control this with the <font color="#5EA702">homepage</font> field in your <font color="#00A7AA">package.json</font>.

The <font color="#00A7AA">build</font> folder is ready to be deployed.
To publish it at <font color="#5EA702">http://lemonunit.github.io/csv-editor-online</font>, run:

  <font color="#00A7AA">yarn</font> run deploy

Find out more about deployment here:

  <font color="#CFAE00">https://bit.ly/CRA-deploy</font>
Done in 54.30s.
Run
start the server:
$ yarn run start

The <font color="#00A7AA">Starting the development server...</font>
Csv-editor is running on port 3000. Let's tunnel it to the port 8026:
$ socat tcp-listen:8026,reuseaddr,fork tcp:localhost:3000

<font color="#646562">_</font>
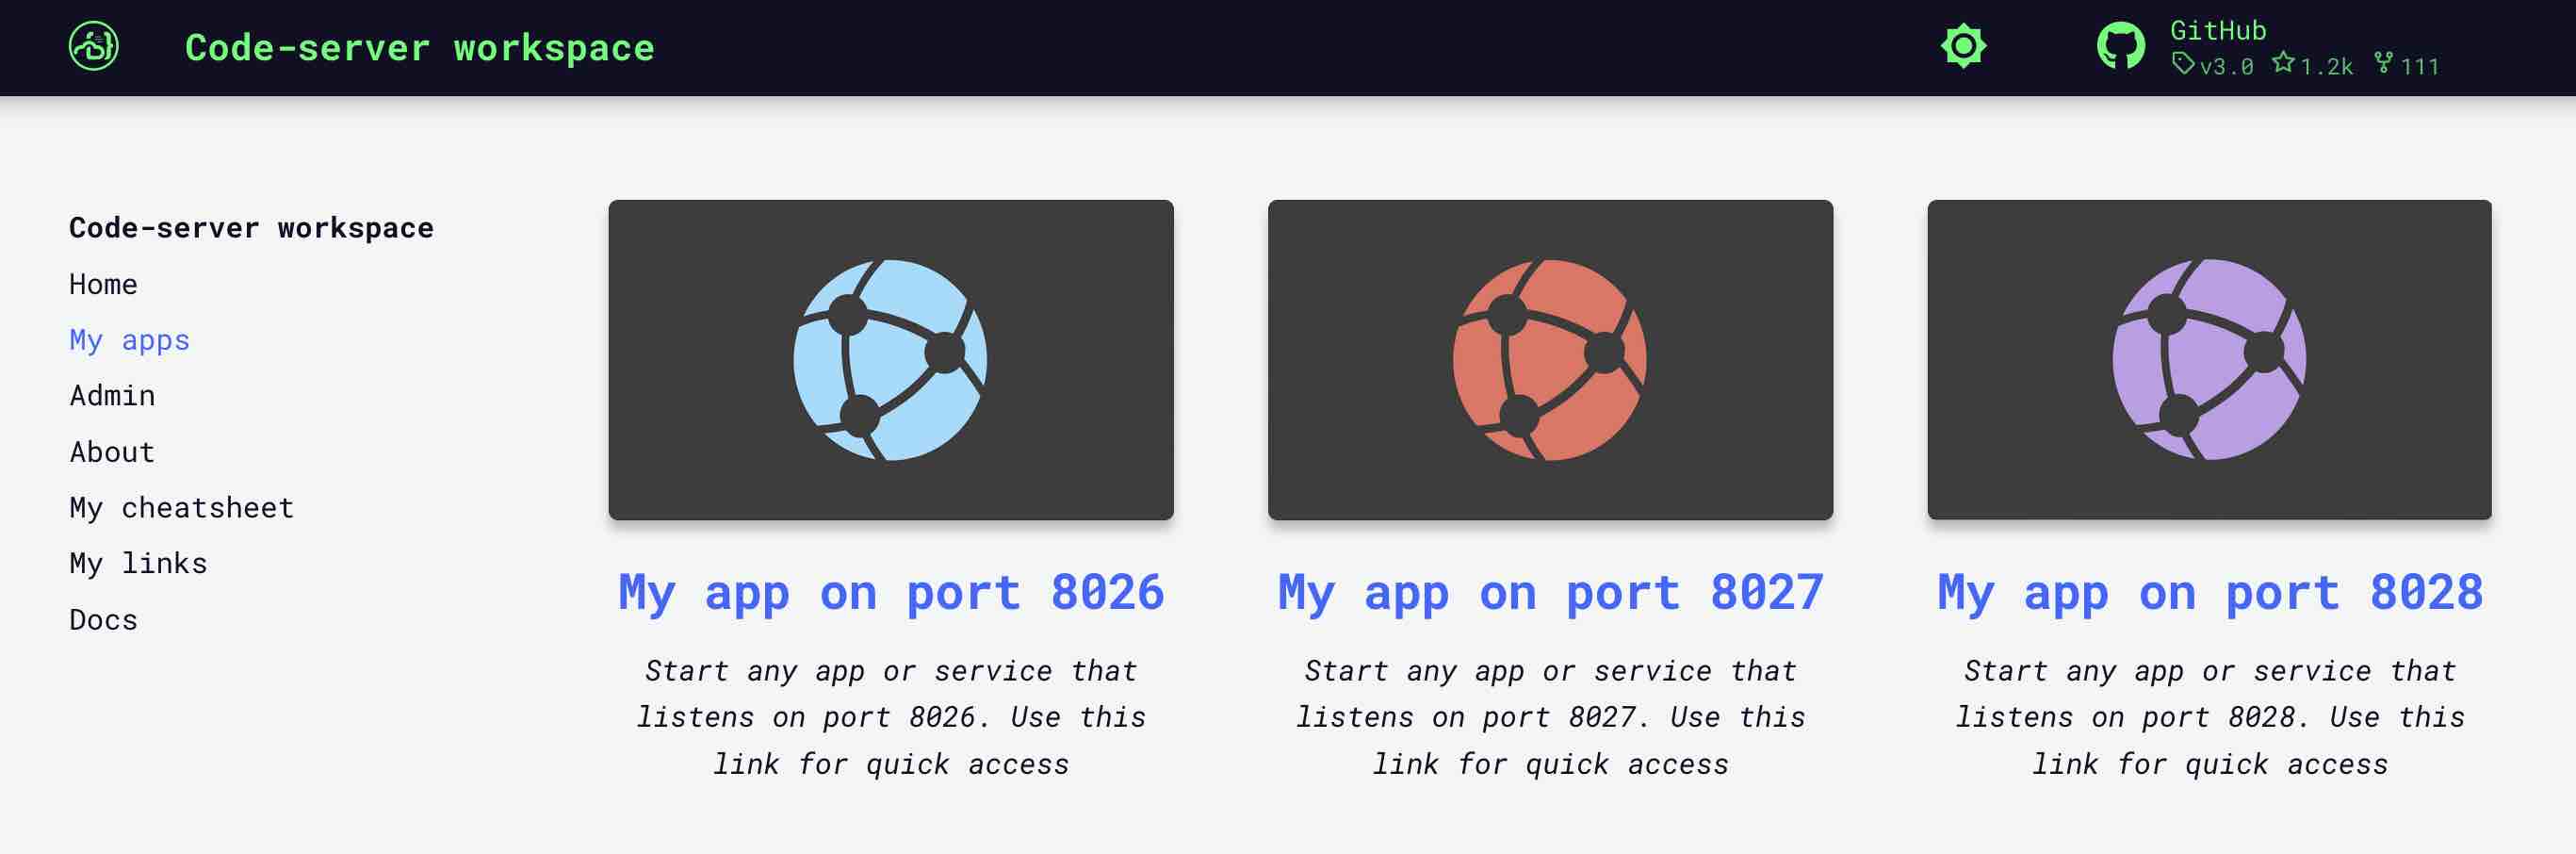
Now you can open Csv-editor using tab "My App on port 8026":
Add to workspace
We can work with Csv-editor now, but as soon as we close the terminal, Csv-editor will stop too. It would be much more convenient if we didn't need to start Csv-editor from the terminal each time. Let's add Csv-editor to the workspace list of services, so that Csv-editor starts automatically.
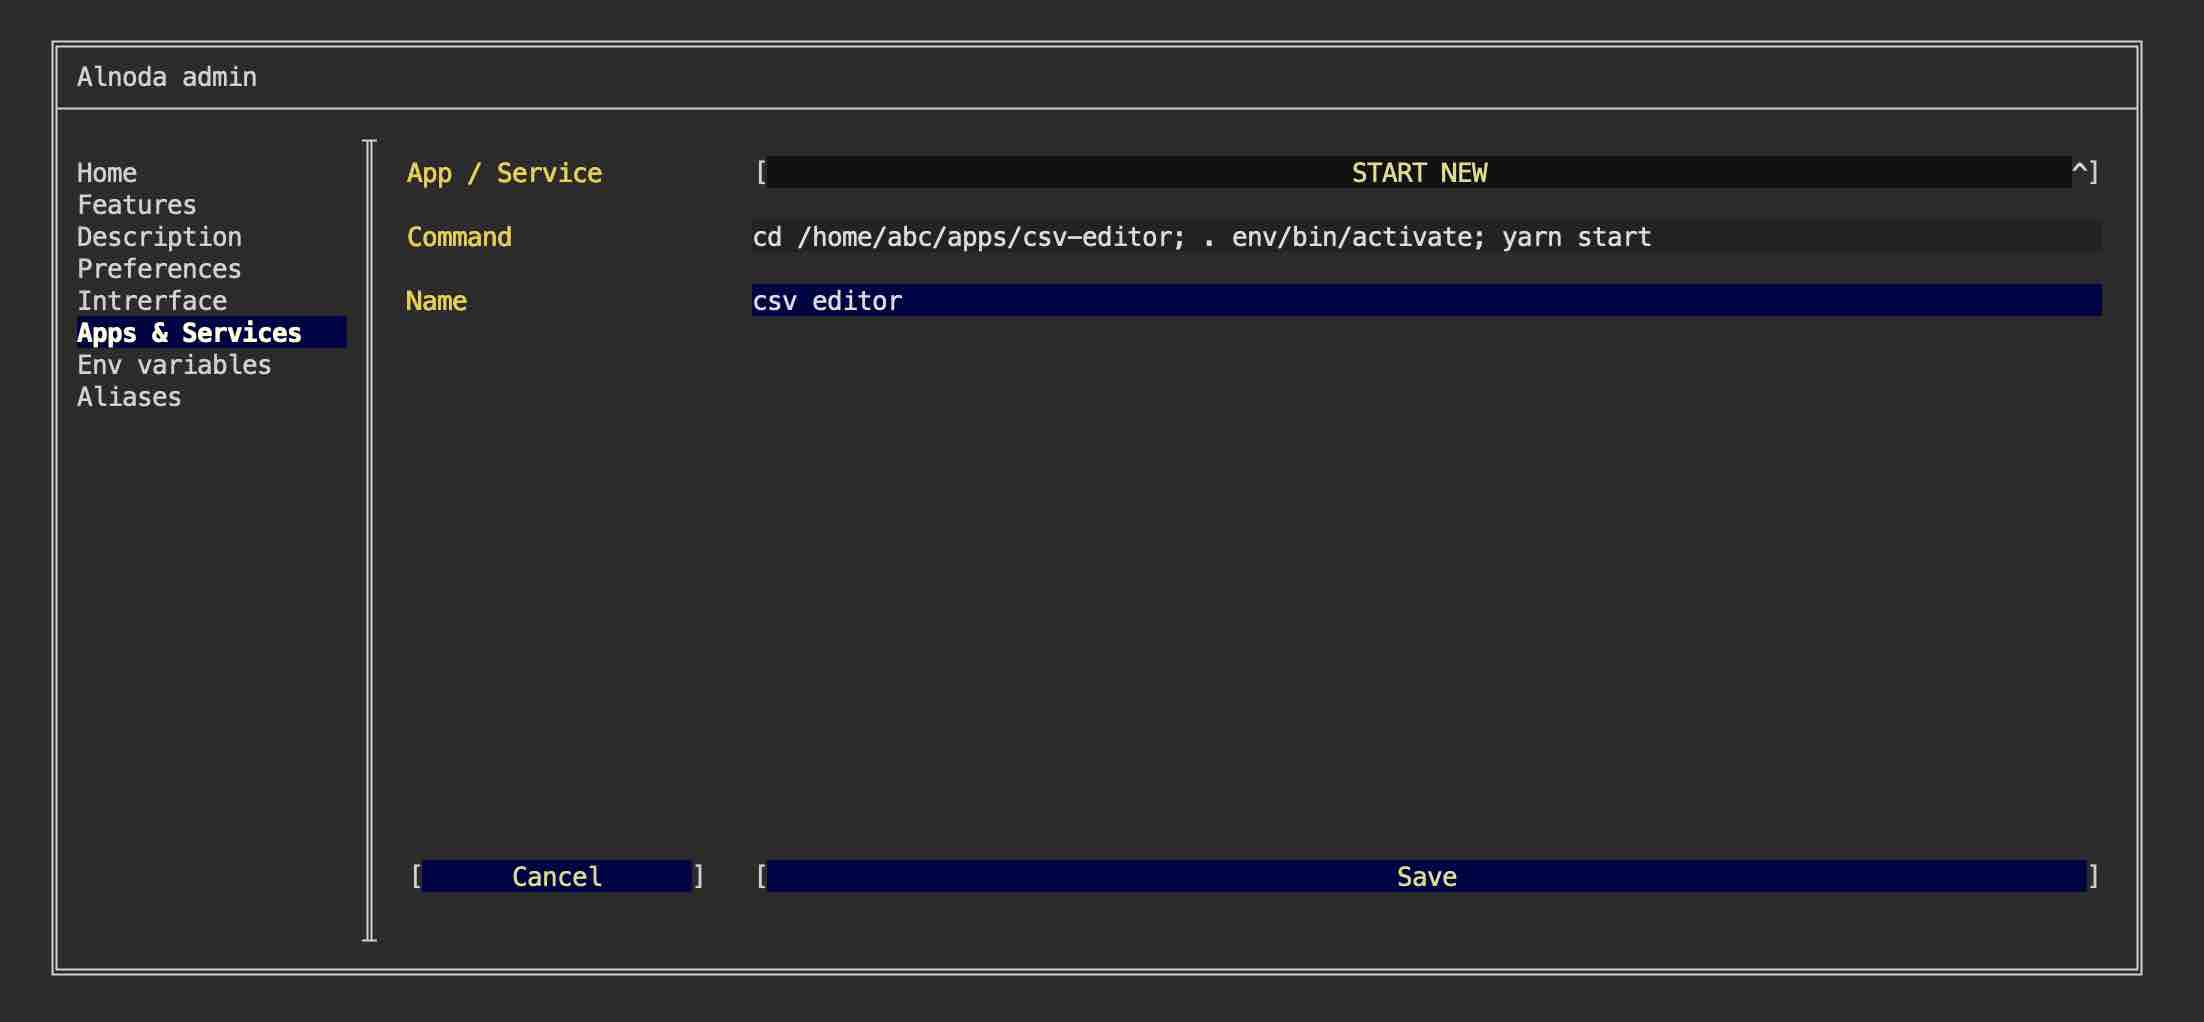
Go to the "Admin" tab, open "Workspace Settings" and go to "Apps & Services". Here we can add new applications to the workspace. To do this we need to provide the command that sarts an application or service, and give this service a name.
Let's first create an entry for the Csv-editor. Select "START NEW" from the picklist, enter any name and paste this command
cd /home/abc/apps/csv-editor; . env/bin/activate; yarn start
This commad will start Csv-editor. It consist of 3 sub-commands, separated by semicolon: go to Csv-editor folder, activate environment and start application.
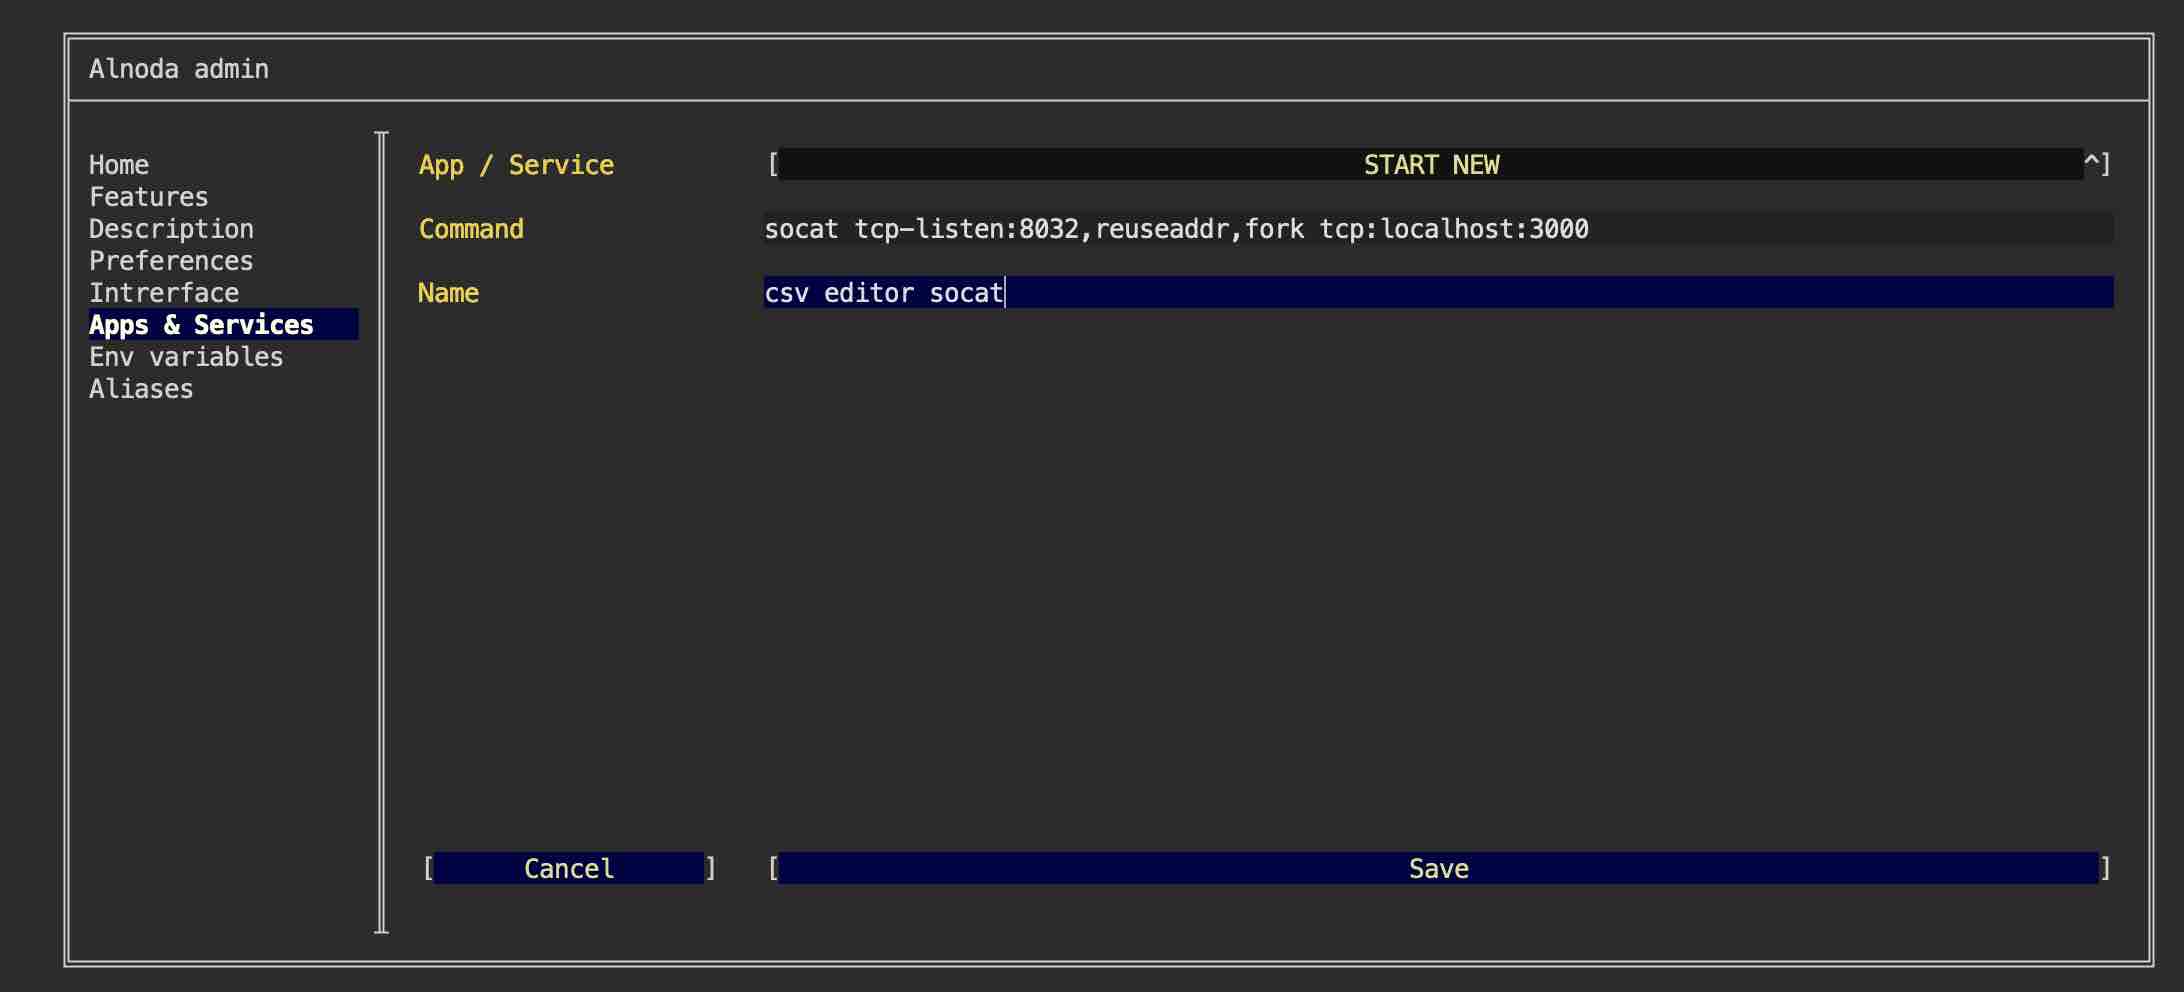
Let's also start the port tunneling, which will map Csv-editor's port 3000 to the port 8032. The latter is in the exposed range, hence it can be accessed.
Warning
This example relies on port 8032 being available within your workspace. To verify the availability of this port, please consult the 'About' tab within your workspace's UI.
Select "START NEW" from the picklist, enter any name and paste this command
socat tcp-listen:8032,reuseaddr,fork tcp:localhost:3000
Please restart the workspace for new applications to start.
Update UI
Finally, let's add Csv-editor shortcut to the workspace UI. This will allow us to open Csv-editor directly from the worspace UI page.
Shortcut has title, description and image. Use filebrowser or IDE to upload any image into the workspace. You can choose whatever you like, one option - is to create a printscreen of the Csv-editor app itself.
After you upload the image to the workspace, go to the "Interface" tab of the workspace settings and select "CREATE NEW" from the picklist.
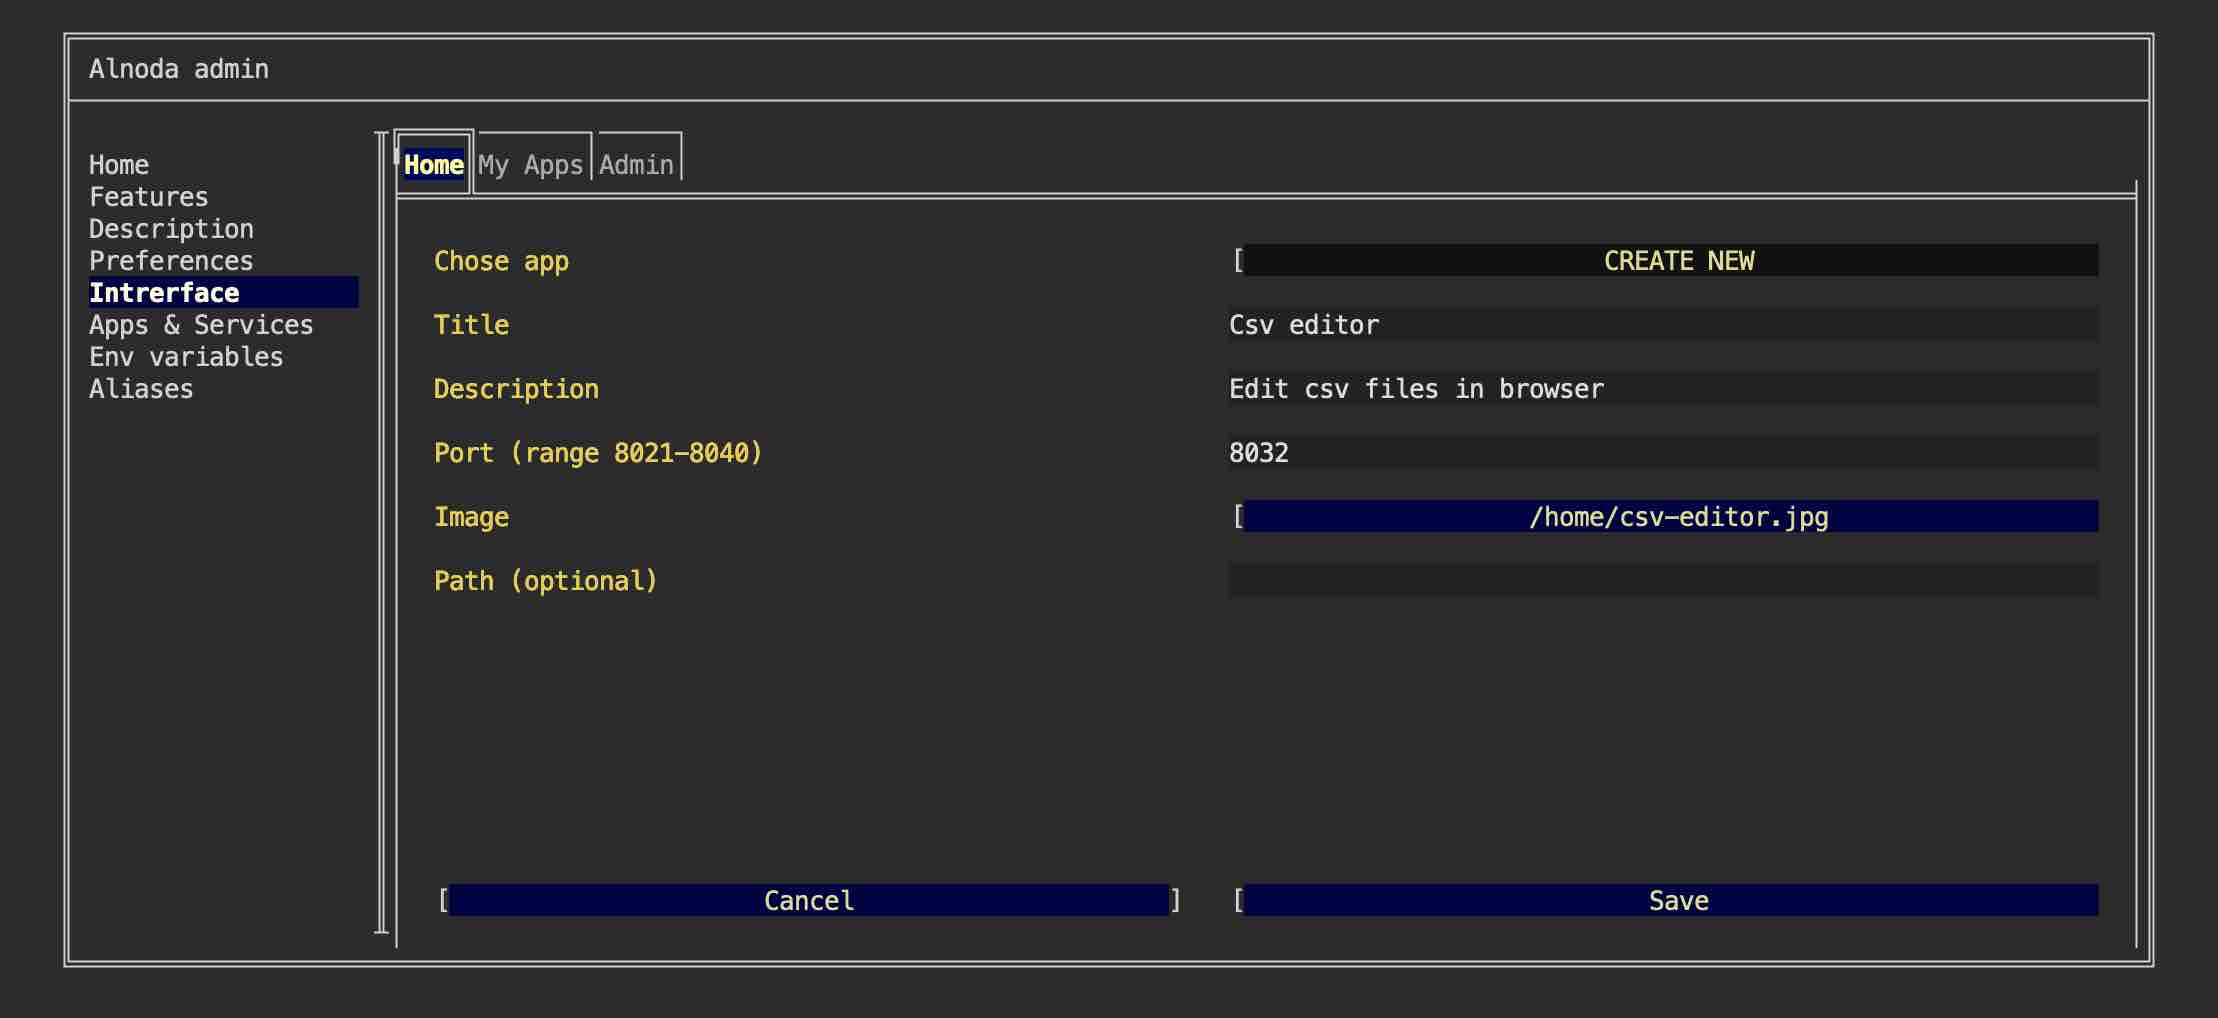
Give it any title and description. In the field "Port" enter port 8032. Leave field "path" blank. Then select your image.
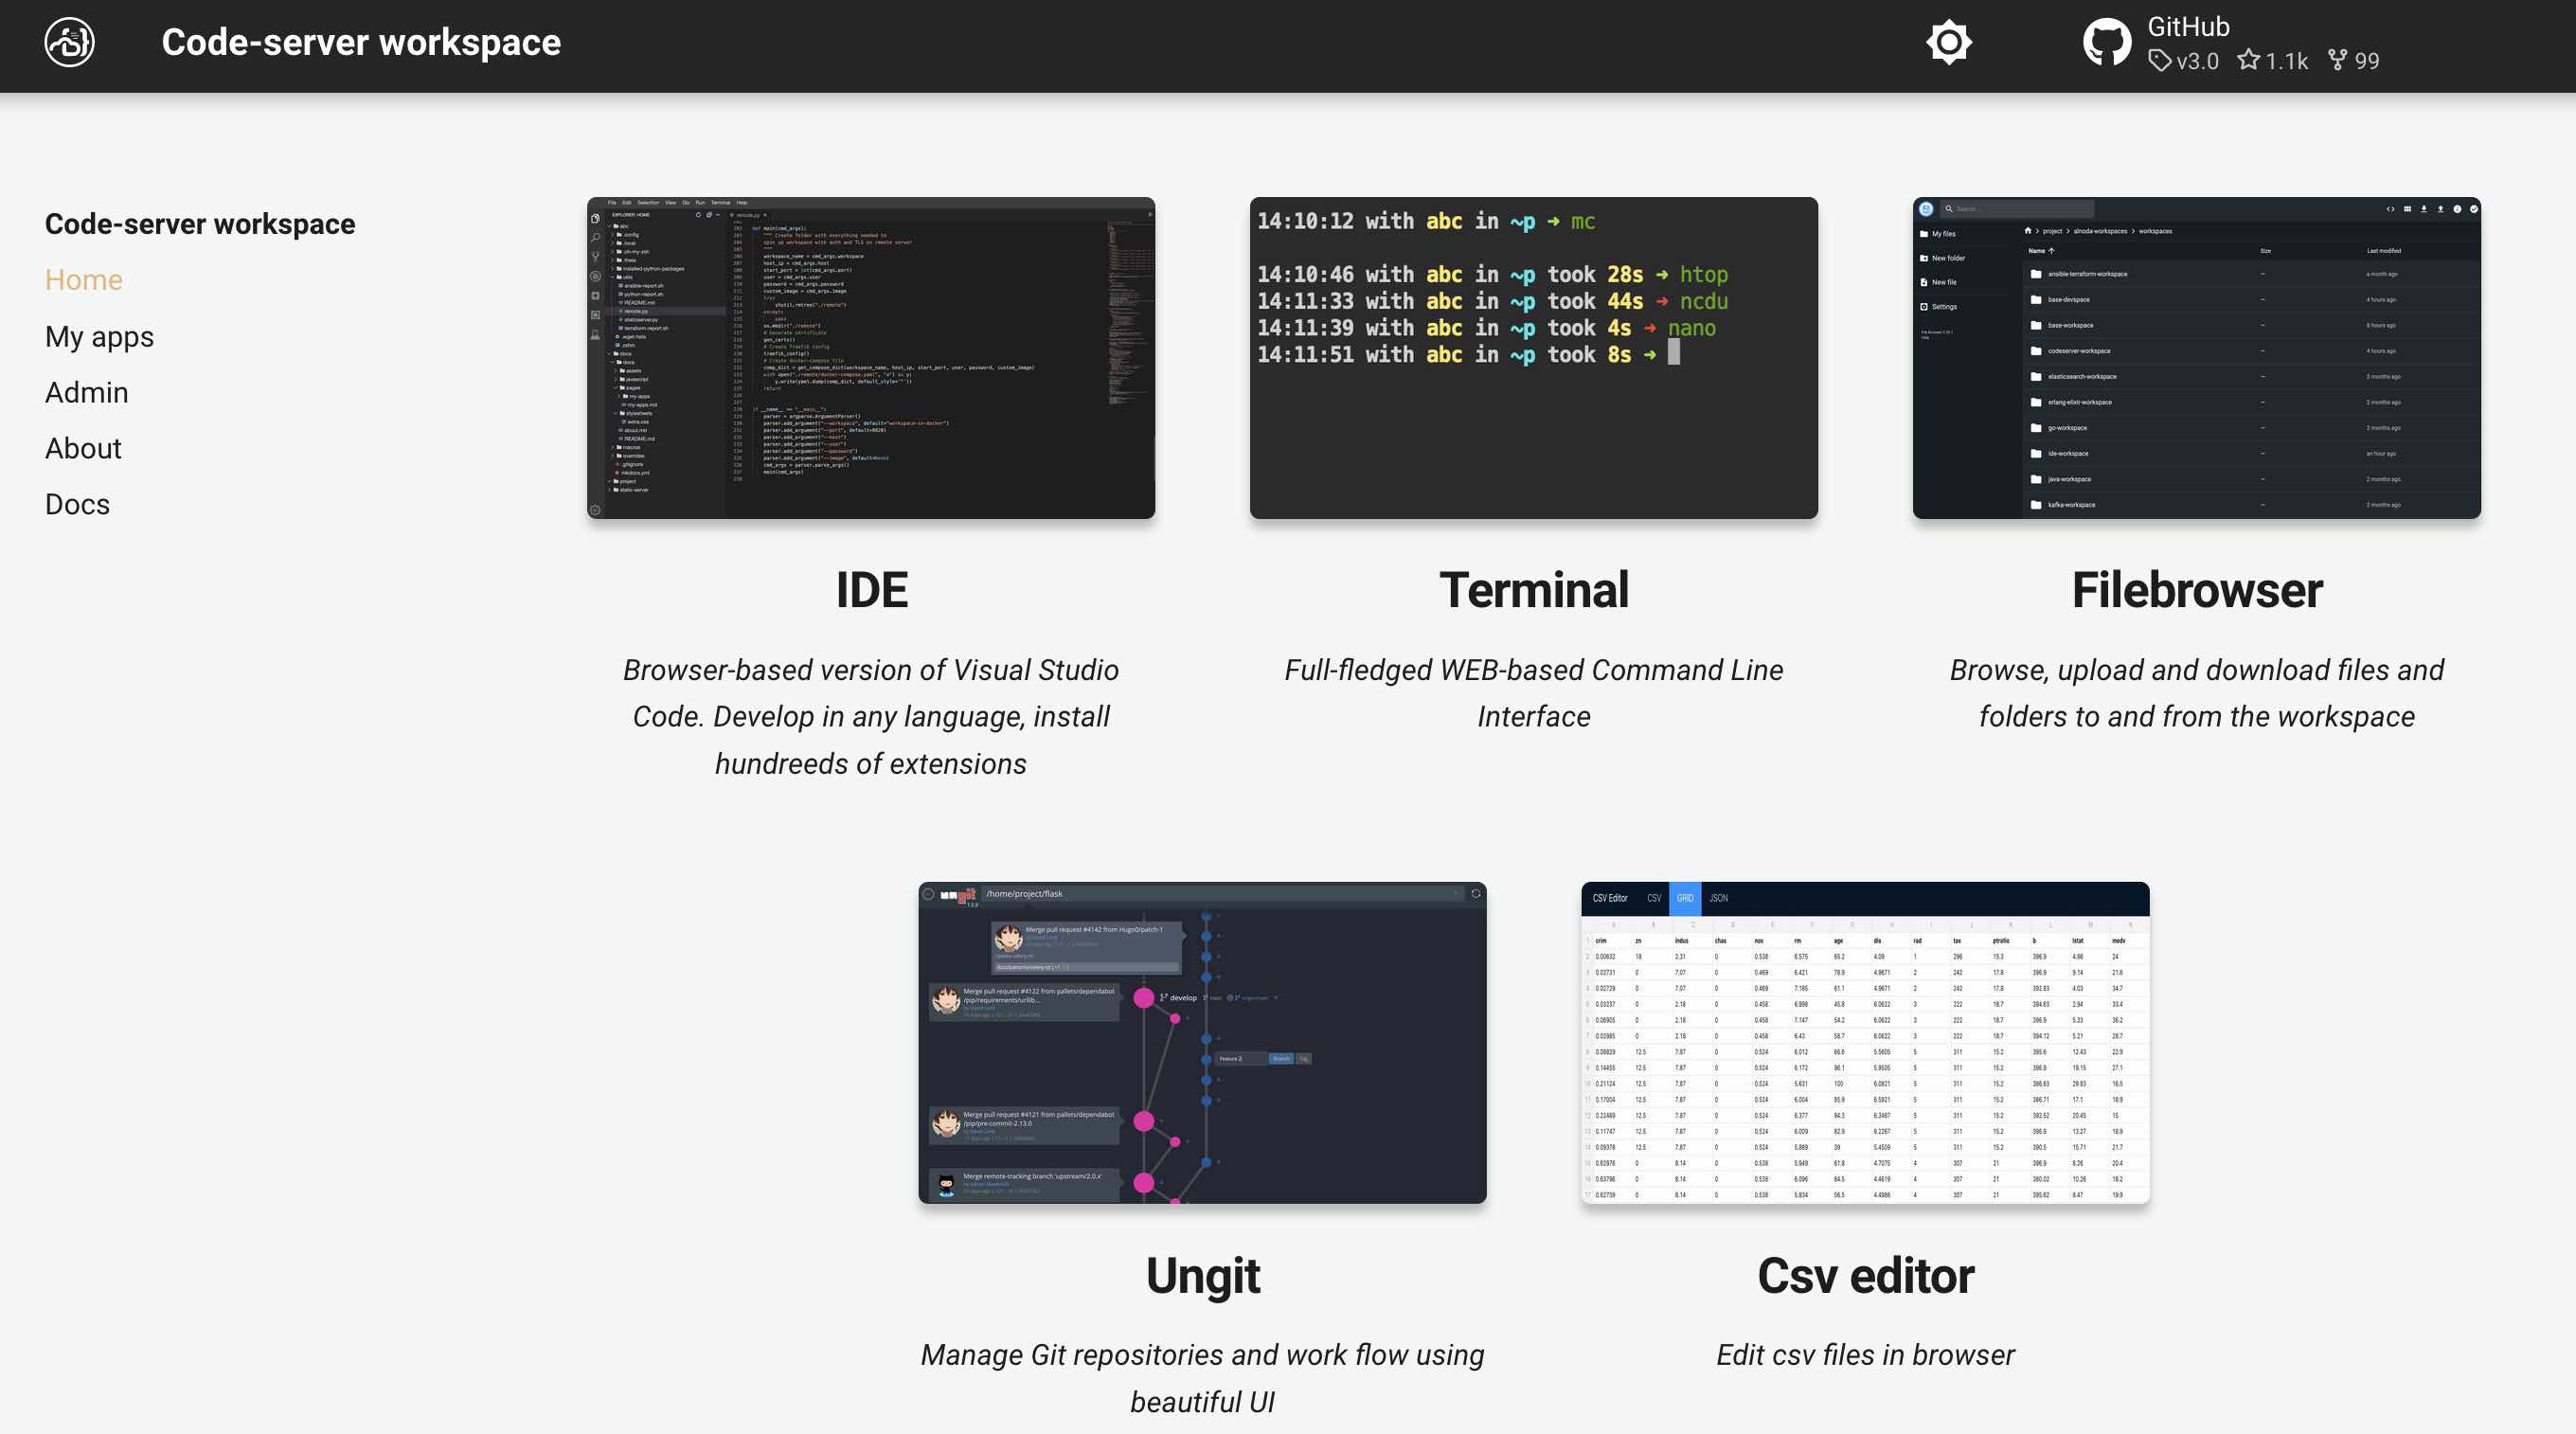
Now we have Csv-editor tab on the Home page of the workspace.
Tip
Use the Alnoda Hub for application installation - it greatly simplifies the process!